Sunday, August 12, 2012
Friday, July 6, 2012
Long day putting in the floor
I'm using n12 simply because it is cheaper than mesh.
I used timber blocks to support the square frame and keep it level. By the time I had to take them away to fill the floor, the concrete had harden up enough to safely remove them. I concreted in the sump pit a couple of days ago and covered the lid in plastic. It is important to have the lid there just so the concrete does not push in the sides making the lid not fit.
It started to rain yesterday, so I put up a canopy - just in case. The bent over rebar will be the ceiling.
The finished result, steel towel finish.
I used my ninja skills to jump out after finishing the toweling ;)
Wednesday, July 4, 2012
Monday, July 2, 2012
Saturday, June 30, 2012
Saturday, June 23, 2012
Excavation day 3
Hit 1.5m, the bottom, still a little bit left for tomorrow.
I should mention that part of the cubbie area will have a concrete ceiling just below ground level. This will make the top of the cubbie smaller in area than the bottom.
Friday, June 22, 2012
Excavation Day 2 , another 60cm
Louka is with me, it needs to go down another 30cm
I even put in a safety rail in case the kids that play in the park come by again.
Wednesday, June 20, 2012
Monday, May 21, 2012
diaphragm wall
It was pretty hard to take a picture of the excavation, so I took a video...
http://youtu.be/31Q05UoX1TE
Sunday, April 15, 2012
Cubby House
My next big project is a cubby house / firepit.
The cubby house is to be partially underground. and the fire put is to be sunken (around 450-500mm). The top of the cubby house will be around 0.9-1m and be a viewing platform/stage for Louka. The bottom bit will be the actual cubby house.
The first step is to remove the builder's toilet - done.
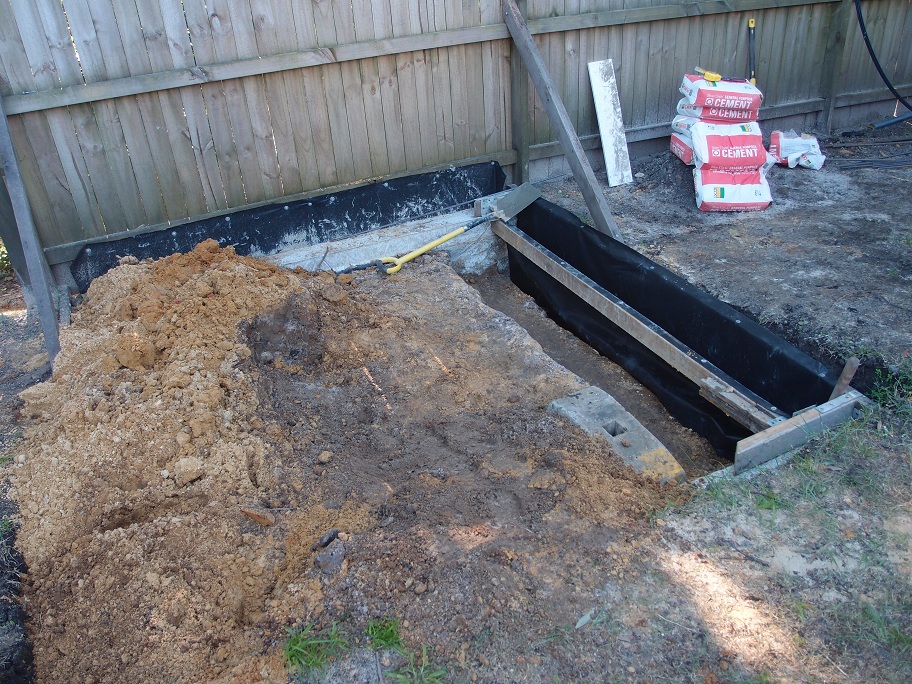
Second is to build what is called a diaphragm wall by the fence. I excavated a trench 100mm x 1400mm below the fence and filled it full of concrete and reo N12 @ 350mm . Being mostly sand, it was easy for the first metre. Then it was hard sandy clay. The idea behind a diaphragm wall is to enable "bulk excavation" without impacting the park. This wall is approximately half the final width of the wall.
The cubby house is to be partially underground. and the fire put is to be sunken (around 450-500mm). The top of the cubby house will be around 0.9-1m and be a viewing platform/stage for Louka. The bottom bit will be the actual cubby house.
The first step is to remove the builder's toilet - done.
Second is to build what is called a diaphragm wall by the fence. I excavated a trench 100mm x 1400mm below the fence and filled it full of concrete and reo N12 @ 350mm . Being mostly sand, it was easy for the first metre. Then it was hard sandy clay. The idea behind a diaphragm wall is to enable "bulk excavation" without impacting the park. This wall is approximately half the final width of the wall.
Friday, October 14, 2011
Bird Attack
Wednesday, October 5, 2011
Camper in the Wild
The camper was never really designed for wet weather. On the first night it rained and rained and the canvas got wet and kind of started wetting ur
bed clothes. Fortunately we packed a plastic tarp. The combination led to a dry night sleep. It also doubles as a bit of insulation for when it is
cold. In short, all is good.
It looks a bit cramped to sleep in, but it is not. There is a good amount of head room and a window towards the front - which is sheltered by the
rain by the tarp. On the tray proper are are tiled rubber mats perfect for muddy environments.
We are at Green Valley - a manual amusement park in the middle of nowhere off a dirt track. It is great. The roller coaster makes an absolute acket
and you have to push it yourself all the way to the top before you jump on and go for a ride. I have got to take some photos.
bed clothes. Fortunately we packed a plastic tarp. The combination led to a dry night sleep. It also doubles as a bit of insulation for when it is
cold. In short, all is good.
It looks a bit cramped to sleep in, but it is not. There is a good amount of head room and a window towards the front - which is sheltered by the
rain by the tarp. On the tray proper are are tiled rubber mats perfect for muddy environments.
We are at Green Valley - a manual amusement park in the middle of nowhere off a dirt track. It is great. The roller coaster makes an absolute acket
and you have to push it yourself all the way to the top before you jump on and go for a ride. I have got to take some photos.
Friday, September 30, 2011
Home Automation
Wednesday, September 28, 2011
camper van
Sunday, September 18, 2011
Ute Camper - Squaring Up
Sunday, September 11, 2011
Camper
Subscribe to:
Posts (Atom)