Ok it use to be that to qualify to become an owner builder, you did a 1 hour online course and assesment - I did while eating my evening meal one night - it did cost around $100.
Now, it is like an 8 day full time course ... lifted from fair trading NSW....
The Course comprises units of competency in five sections as follows:
•Preparing to be an owner-builder (OBPERNSW001 Prepare to be an owner-builder)
•Occupational Health and Safety (CPCCOHS2001A Apply OHS, requirements, policies and procedures in the construction industry)
•Drawing, Estimating and Cash Flow (CPCCCM2001A Read and interpret plans and specification; CPCCCM1001A Undertake basic estimation and costing)
•Managing contracts (OBPERNSW002 Administer contracts)
•Managing the work (CPCCCM1003A Plan and organise work; CPCCCM1004A Conduct workplace communication)
A WorkCover Construction Induction Card is a prerequisite for the Course. More information can be obtained from the training providers below, or from WorkCover.
Like I said OMG! I guess too many owner builders making a complete mess of things.
Sunday, December 26, 2010
Thursday, December 23, 2010
www.maternitysale.com.au
My cousin just lauched this site: www.maternitysale.com.au It is really good and has absolutely nothing to do with building a beach house. On the otherhand, suprisingly there is a link between building and maternitywear.
Tuesday, December 21, 2010
lights
I just added some external lights (bottom three) for the pathway to the front door. Absolute pain as I added a two way switch down near the garage doors. I managed to make everything look pretty by threading the wires through the wall cavity. I drilled a hole in the floor to get the cables down into the garage section. I used aussie duct to mechanically shield the wires.


Sunday, December 5, 2010
Temp controlled brew fridge
I've started home brewing again and decided to go for a temperature controlled brewing fridge. It has an industrial fridge controller. I drilled a hole for the probe. I'm now 'sharing' louka's kitchen.

I used etc-100 from perfectconcepts.com.au. It is a dinky die fridge controller with a compressor start delay, on and off temperature.

I used etc-100 from perfectconcepts.com.au. It is a dinky die fridge controller with a compressor start delay, on and off temperature.
Saturday, October 9, 2010

Monday, October 4, 2010
Beer Bath
I made up a frame for a bath to be used to keep beer cold for a wedding...The bath was something that got damaged during construction. So I guess this is recycling.


Sunday, September 26, 2010
magnetic catch
The fridge is relatively old - 7 years I think. Anyway, after replacing the seal, it still didn't stay closed. Opening and closing the freezer would sometimes open the fridge. The DIY solution is to make up and install a magnetic catch. I used a 3 dollar magnetic with a 3kg pull with this job. The spring maintains the alignment It works well and my daughter has no trouble opening it.


We also installed some curtains to keep out the morning sun's glare.

Tuesday, September 21, 2010
hotwater timer
We got a small electric tank hotwater system for the following reasons; to save water and energy (the pipe run to the instantaneous gas is quite long - 20m or so), we like the kitchen hotwater to be very hot, we want it to come on straight away and we like to trickle the hotwater.
The only problem with the small electric tank hotwater systems is that they don't have an off peak circuit. So to save on the energy bill, I have been trying to make sure it is off during the peak times (2pm to 8pm). Effectively this means turning it on just before I go bed and then turning on off when I wake up. Unfortunately not only is an effort to remember, the hotwater is not really hot come time to wash up at 7pm.
The solution was to put in a timer. The one I got from Jaycar at $60 is really good. It is battery backed up and has enough configuration so I can turn in on at 6am leave it runing through the shoulder to 2pm on weekdays and leaving it runing to 10pm on the weekend.

On the weekend, I did some more painting both inside and outside...

Sunday, September 12, 2010
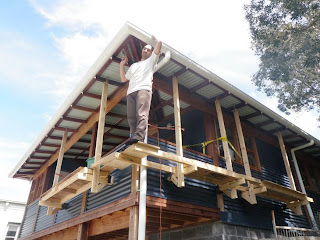
scafolding, power point and letter box
I've been sick for the last three weekends, so it was good to start working on the house again.
I "moved" the power point for the microwave so we can turn it off athe the point to save power. Ocassionally the microwave does not seem to shut off, so it is also easier to reach the switch. The toaster stopped working properly, so I recycled the power lead and a spare power point to do the job.

Yay a new letter box - nice blue colour to match the house.

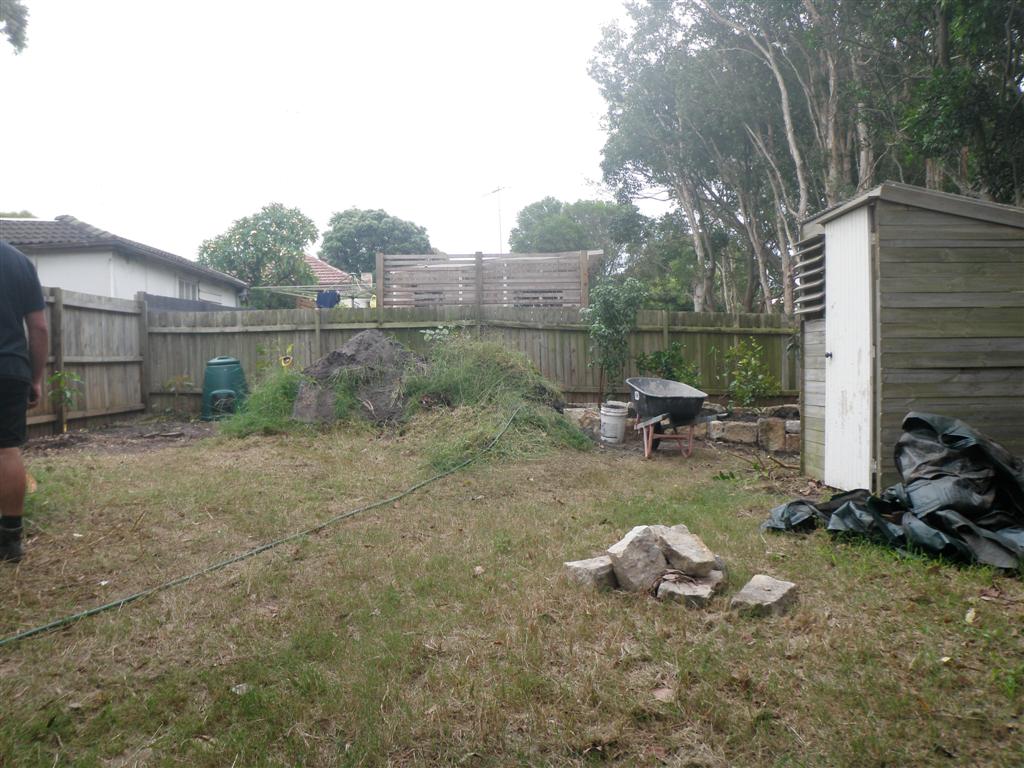
We also put in some seeds and seedling out the back. Hopefully we should have a productive garden very soon. The broad beans have flowers on them and we are expecting a bumper crop.
I "moved" the power point for the microwave so we can turn it off athe the point to save power. Ocassionally the microwave does not seem to shut off, so it is also easier to reach the switch. The toaster stopped working properly, so I recycled the power lead and a spare power point to do the job.

Yay a new letter box - nice blue colour to match the house.

Here is me on my scafolding paintin the eves. For some reason my new neigbour across the road thought I was doing an extension - a porch.

We also put in some seeds and seedling out the back. Hopefully we should have a productive garden very soon. The broad beans have flowers on them and we are expecting a bumper crop.
Sunday, August 15, 2010
scaffolding
I've being getting around to putting the timber finish on the outside of the house. This involves setting up my ultra cool scaffolding...much safer than a ladder.

Sunday, August 8, 2010
Moving power point and splash back
After a bit of a break from blogging, I thought I would continue.
The electrical authority told me that the power point was tool close to the burners, so I had to move it. Hack, hack and it is now in a new place. It had to go into the plaster board as there is just a solid timber post behind it. I screwed the plaster board edges into the timber just to make sure they don't move.
I turned the power off to the power point circuit, but I did not realise that the exhaust fan ran off the lighting circuit. Zap, I electricuted my little finger. The RCD did do trip because the two switch wires short circuited through my finger.

Then I tiled the splash back. Not shown is the laundry and front kitchen splash backs. It will be liz's job to do the grouting - cause I don't do grouting.

The 2 floor boards bridging the pantry and the kitchen started to lift. Not good as the sliding door would no longer close. I needed to remove the sliding door to get fix the floor boards, but I could not remove the door because of them - drat. Fortunately after thinking about it for a while, I found I could saw out a little bit of the door frame to remove the door - I intend on patching it one day.
I fixed the rising floor boards using a car jack and a length of timber between the offending boards and the door frame. Just enough pressure to force the boards down, but not too much to destroy the house. Then I screwed the boards down from the underneath the floor. I made sure that the screws did not penetrate the top of the boards. Problem solved. Now I just need to get liz to paint the door and I will put it back.
Thursday, June 3, 2010
Front garden
Some weeks ago, Graham built up a garden bed in front of the house. Suddenly it stopped looking like a building site and started looking like a house and garden. Apart from two figs, three passionfruits and three citrus, it's my garden, and mostly natives.

I put in some stepping stones.

Louka has a little row of her own choices along the wall.


I put in some stepping stones.

Louka has a little row of her own choices along the wall.


Sunday, February 14, 2010
Bone Dry Garage
Despite the amount of rain, my garage remains bone dry. I think 90% of the reason behind this is that the building is on sand. It is funny that the garage (my pride and joy) seems like a world away from the main house - kind of a different planet.
Inauspicious beginning
Last Thursday council notified us that we could move in, so yesterday we took bedding, food, utensils, table and chairs and stayed for the weekend. We installed the cooktop (but didn't connect the gas) and Graham cleaned up the bathroom, then I cooked a simple dinner on a plug-in two-burner hotplate and we went to bed.
A while later, Louka sat up in bed and vomited. We cleaned her and the bed as best we could and went, or tried to go, back to sleep. By the third time we were ready with a bucket and damp cloth (from a big bag of rags) but the fourth time she was too quick for us. Not much sleep for any of us.
In the morning she was hot and miserable but of course we had no panadol, so Graham went off to the pharmacy to find some. Fortunately it was open. She fell asleep again and we managed to sort out all the rubbish and cardboard boxes (hundreds of cardboard boxes) so Graham could take a load to the tip. Louka woke up feeling better and had some lunch, but soon brought that up again.
When Graham got back from the tip we started painting the living room, but after a while Louka felt sick again and only wanted to be held by me, so Graham had to clean up on his own. Then he had to pack the ute himself, and of course it rained again on the way home. We'll have to get some sort of cover for the ute.
Thursday, February 11, 2010
I can now move in!
I sent the council the remaining certificates that they require for an interim occupancy certificate last week. Unfortunately they never got them in time to give me certificate by this weekend. However, over the phone they gave me the ok to move in. I'm so relieved.
Thursday, February 4, 2010
Kitchen drawers
While Louka was at kindergarten today, I spent some time putting together kitchen drawers. Graham had said it was easy.
I managed to figure out how the standard parts went together, but I had no idea which drawer front went with which drawer. So mostly I just put all the backs, sides and bottoms together. I did figure out a set of narrow drawers so I installed them: I hope they're right! I also managed to break one of the big ones. The sides and back click together, then the bottom slides in. However, sliding in the big unwieldy bottom caused the back and sides to come apart, and the little plastic clip holding them together just snapped, and the corner chipped off the chipboard bottom too. I guess we can take it back.


I managed to figure out how the standard parts went together, but I had no idea which drawer front went with which drawer. So mostly I just put all the backs, sides and bottoms together. I did figure out a set of narrow drawers so I installed them: I hope they're right! I also managed to break one of the big ones. The sides and back click together, then the bottom slides in. However, sliding in the big unwieldy bottom caused the back and sides to come apart, and the little plastic clip holding them together just snapped, and the corner chipped off the chipboard bottom too. I guess we can take it back.


Sunday, January 17, 2010
Gunk From First Flush
The water tank has started to fill up. I checked the first flushes and they are collecting a lot of gunk. One of the devices had even blocked. I put in wider apeture drippers.

I shone a torch into the tank. It had a slight brown tinge. Hopefully it will settle.
The system actually has a number of filters. A course and fine one in the form of a leaf guard. A fine mesh one into the tank. And finally a very fine one just after the pump.
I think the secret will be in cleaning out the gutters and leaf guards often.
Friday, January 8, 2010
Saturday
I'm only allowed to work on the site between 8am and 1pm on Saturdays.
I cleaned out the gutters. They were chockers. Anyway the best thing about it was that it only took me around 15 minutes to do so. This is because the roof has only a 9 degree slope and that the round gutters do not have over hanging clips. I won't get any leaf guard simply because it would take me probably around 4 hours to remove and replace it when I needed to clean it.
I managed to tidy a few things up. I finished putting in the balastrade wires, put in th brackets to support the first flush devices, put in the silicone for the bath and part of the kitchen bench and put in the fence between the building and the main fence. I won't be able to completely finish it off until the temporary toilet and water supply goes.

Last Day
Today was my last day. I go back to work next week. Aside from the electrics (which I not allowed to do), I can now apply for an interim occupancy certificate. The main reason why I can't apply for a final one is that I don't have airconditioning! Go and figure!
I'm happy how things have gone.
As an asside, the down stairs bathroom is complete. Shower, toilet and laundry sink (not shown).

Most of the day was spent connecting up the storm water to the tank and putting in the first flush devices.
I'm happy how things have gone.
As an asside, the down stairs bathroom is complete. Shower, toilet and laundry sink (not shown).

Most of the day was spent connecting up the storm water to the tank and putting in the first flush devices.
Wednesday, January 6, 2010
Kitchen Bench Top
Along with putting back the doors (after tiling), I put in the kitchen sink and benchtop.

Interestingly, it is possible to remove the legs of the kitchen for finishing the floor. The reason being is that they are fixed to the wall.

Interestingly, it is possible to remove the legs of the kitchen for finishing the floor. The reason being is that they are fixed to the wall.
Monday, January 4, 2010
Ikea Kitchen
I've spent the last couple of days putting in the Ikea kitchen. It is pretty straight forward.
The design does not give much flexibility in attaching the cabinents to the walls. It is not very good for my timber stud wall. To solve this I did one of two things. One option was to create horizontal anchor points by installing a piece of timber that spans the cabinet sides. The other option is simply to move the anchor angles from their standard position on the cabinent sides to the top and bottom.
The adjustable legs make leveling the benchtops easy. When attaching to the wall I did use packers to compensate for the lack of a perfectly straight wall.
I added some more bracing for the sink and gave it the sit test and it was fine. I may need to brace the stove top as well. I guess we will see.
Obviously the whole set up has been carefully engineered to avoid waste.
The plumber dropped in and expressed a desire to put in the fittings before the benchtop. I've got other things to do, so that is fine.

The council inspected my stormwater. No problems - yay! We discussed what is required for an interim occupancy certificate. Not too much. Probably the biggest thing is the electricity. Hopefully I'll be able to finish every thing I need to by the weekend
Subscribe to:
Posts (Atom)