I think I have brewed enough good beer to come up with some wisdom about brewing.
1) Use coopers plastic bottles to package your beer. It is impossible for them to explode. They probably will fail around the 10 bar mark (atmospheres) and yeast will stop fermenting way before that - not too sure exactly what pressure the yeast will stop working, but they do recommend you limit your commercial brew tanks to 15m (1.5bar). hmmm I feel this is right for an experiment. I've read that Co2 will freely go between disolved and bubble state at around 6 atmospheres.
2) Never rack your beer. The beer really needs to hang around after primary fermentation stops for the the yeast cells to absorb nasty bad tasting chemicals (diacetyl). Let it sit for about three days before bottling.
3) Don't boil your wort if you are using kit cans. Another waste of time - you will remove the volitiles in the hops.
Saturday, January 22, 2011

stepping stones
I finally got around to putting in the stepping stones in the front garden. They were pretty heavy and made me exhausted fairly quickly... They are partially buried ~ %50 so you can get an idea of their size.

It was all too much for the trolley and one of the wheels fell apart on the first stone and that was not even the heaviest. It just kind of popped apart. I'll probably repair it somehow. I ended up using my wheel barrow for the rest - the only problem was I had to lift them, carry them a metre or so and gently plonk them in. I mostly lift with my knees so my knees feel like they are falling apart at the moment - and I have massive knees. My hands are a bit tender as well.


It was all too much for the trolley and one of the wheels fell apart on the first stone and that was not even the heaviest. It just kind of popped apart. I'll probably repair it somehow. I ended up using my wheel barrow for the rest - the only problem was I had to lift them, carry them a metre or so and gently plonk them in. I mostly lift with my knees so my knees feel like they are falling apart at the moment - and I have massive knees. My hands are a bit tender as well.

under siege kookaburra
Liz noticed three kookaburras hanging out the back. Maybe the are looking for juicy mice.


It was still there after it got a little darker - maybe it thinks it is an owl.

bird netting for figs
I made up a couple of frames to throw bird netting over to protect the figs from birds. I hope they work as we have some nice figs on the trees. I got the bird netting from www.pestawayaust.com.au Very quick service - arrived in a couple of days.
Bunnings could not help me :( I find them funny - despite their huge store, a few times they have look at me and made polite noises as if I was silly to think they would stock _that_ item. And these sorts of big stores complain that people are buying stuff over the internet.

Bunnings could not help me :( I find them funny - despite their huge store, a few times they have look at me and made polite noises as if I was silly to think they would stock _that_ item. And these sorts of big stores complain that people are buying stuff over the internet.

davidson plum
On the south side of our house - the bit that gets very little sun, I planted a davidson plum. If you look closely at its trunk you can see the tiny plums. Suprisingly, it is growing well here. Hopefully it will be able to dodge the roof as it gets higher.

Close up of a ripe plum - the size of large grape.

Sunday, January 16, 2011

Insect that make you jump
This one landed right next to me when I was closing the garage door - it made me jump ;)

Yep around 25cm long and it flies.

My 5 minute google search makes me think it is a male Ctenomorpha Chronus that is probably lost.

Yep around 25cm long and it flies.

My 5 minute google search makes me think it is a male Ctenomorpha Chronus that is probably lost.
Saturday, January 15, 2011
front office almost finished
Finally I've just got around to putting this up. Work took 4 days, but it is done (almost - need to hide some power cables).

As you can see I used the Ikea kitchen system - you are looking at just over 4000 dollars worth of kit. I really like their soft close draws.
Obviously the standard bench height of 900mm would be no good, so I used some spare timber flooring to construct a plinth. That reduced it to 760mm. The floor was not exactly flat and level, so I used plastic packers (plastic shims) to pack out a level height. I screwed the cabinets to the plinth so it (plinth) didn't move. Pretty ugly at photo level, but you just don't see it unless you want to make like a mouse.

I've got a bit of tiding up here to do, but you can see how the cables run. The power cables go up through the wall cavity to the power points which are 8cm above the table bench. I put timber flooring right where my feet would hit just so I don't mark the wall with my black soled shoes.

Here you can see I first mounted a strip of timber below the wall cabinets before I installed them. It gives them a nice level and strong stop to rest onto. Below, you can see I put some timber skirting where the wall meets the bench. I sealed them with silicone in case there were any spills. The advantage of the power points at bench level is that we can turn them off at the point to save power.

Walls are never perfect enough to accommodate long lengths of cupboards, so to allow for my convex wall, I put in a timber spacer. You can just see that it is narrower at one end then the other. It is also great for running cables. It allowed me to mount yet another power point for the printer.

Liz helped me put together and install the doors and draws - a long tedious process that is made heaps easier with an battery powered drill used as a screw driver.

As you can see I used the Ikea kitchen system - you are looking at just over 4000 dollars worth of kit. I really like their soft close draws.
Obviously the standard bench height of 900mm would be no good, so I used some spare timber flooring to construct a plinth. That reduced it to 760mm. The floor was not exactly flat and level, so I used plastic packers (plastic shims) to pack out a level height. I screwed the cabinets to the plinth so it (plinth) didn't move. Pretty ugly at photo level, but you just don't see it unless you want to make like a mouse.

I've got a bit of tiding up here to do, but you can see how the cables run. The power cables go up through the wall cavity to the power points which are 8cm above the table bench. I put timber flooring right where my feet would hit just so I don't mark the wall with my black soled shoes.

Here you can see I first mounted a strip of timber below the wall cabinets before I installed them. It gives them a nice level and strong stop to rest onto. Below, you can see I put some timber skirting where the wall meets the bench. I sealed them with silicone in case there were any spills. The advantage of the power points at bench level is that we can turn them off at the point to save power.

Walls are never perfect enough to accommodate long lengths of cupboards, so to allow for my convex wall, I put in a timber spacer. You can just see that it is narrower at one end then the other. It is also great for running cables. It allowed me to mount yet another power point for the printer.

Liz helped me put together and install the doors and draws - a long tedious process that is made heaps easier with an battery powered drill used as a screw driver.
Tuesday, January 4, 2011
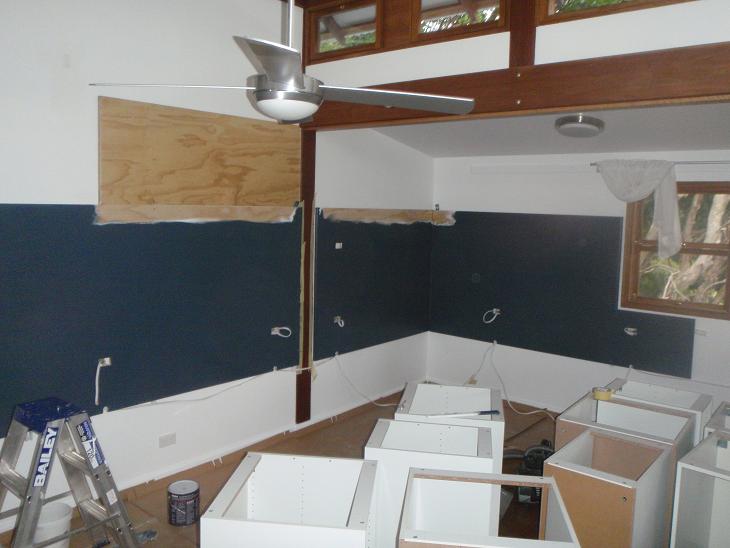
Activity Room Fit Out
I've bitten the bullet and started on the activity room. It should be good. I've mounted plywood on the walls for cupboards to hang from and power points to hang through. Liz and Spooky get the desk below the window and I get the corner.

Sunday, December 26, 2010
OMG they changed the owner builder rules!
Ok it use to be that to qualify to become an owner builder, you did a 1 hour online course and assesment - I did while eating my evening meal one night - it did cost around $100.
Now, it is like an 8 day full time course ... lifted from fair trading NSW....
The Course comprises units of competency in five sections as follows:
•Preparing to be an owner-builder (OBPERNSW001 Prepare to be an owner-builder)
•Occupational Health and Safety (CPCCOHS2001A Apply OHS, requirements, policies and procedures in the construction industry)
•Drawing, Estimating and Cash Flow (CPCCCM2001A Read and interpret plans and specification; CPCCCM1001A Undertake basic estimation and costing)
•Managing contracts (OBPERNSW002 Administer contracts)
•Managing the work (CPCCCM1003A Plan and organise work; CPCCCM1004A Conduct workplace communication)
A WorkCover Construction Induction Card is a prerequisite for the Course. More information can be obtained from the training providers below, or from WorkCover.
Like I said OMG! I guess too many owner builders making a complete mess of things.
Now, it is like an 8 day full time course ... lifted from fair trading NSW....
The Course comprises units of competency in five sections as follows:
•Preparing to be an owner-builder (OBPERNSW001 Prepare to be an owner-builder)
•Occupational Health and Safety (CPCCOHS2001A Apply OHS, requirements, policies and procedures in the construction industry)
•Drawing, Estimating and Cash Flow (CPCCCM2001A Read and interpret plans and specification; CPCCCM1001A Undertake basic estimation and costing)
•Managing contracts (OBPERNSW002 Administer contracts)
•Managing the work (CPCCCM1003A Plan and organise work; CPCCCM1004A Conduct workplace communication)
A WorkCover Construction Induction Card is a prerequisite for the Course. More information can be obtained from the training providers below, or from WorkCover.
Like I said OMG! I guess too many owner builders making a complete mess of things.
Thursday, December 23, 2010
www.maternitysale.com.au
My cousin just lauched this site: www.maternitysale.com.au It is really good and has absolutely nothing to do with building a beach house. On the otherhand, suprisingly there is a link between building and maternitywear.
Tuesday, December 21, 2010
lights
I just added some external lights (bottom three) for the pathway to the front door. Absolute pain as I added a two way switch down near the garage doors. I managed to make everything look pretty by threading the wires through the wall cavity. I drilled a hole in the floor to get the cables down into the garage section. I used aussie duct to mechanically shield the wires.


Sunday, December 5, 2010
Temp controlled brew fridge
I've started home brewing again and decided to go for a temperature controlled brewing fridge. It has an industrial fridge controller. I drilled a hole for the probe. I'm now 'sharing' louka's kitchen.

I used etc-100 from perfectconcepts.com.au. It is a dinky die fridge controller with a compressor start delay, on and off temperature.

I used etc-100 from perfectconcepts.com.au. It is a dinky die fridge controller with a compressor start delay, on and off temperature.
Saturday, October 9, 2010

Monday, October 4, 2010
Beer Bath
I made up a frame for a bath to be used to keep beer cold for a wedding...The bath was something that got damaged during construction. So I guess this is recycling.


Sunday, September 26, 2010
magnetic catch
The fridge is relatively old - 7 years I think. Anyway, after replacing the seal, it still didn't stay closed. Opening and closing the freezer would sometimes open the fridge. The DIY solution is to make up and install a magnetic catch. I used a 3 dollar magnetic with a 3kg pull with this job. The spring maintains the alignment It works well and my daughter has no trouble opening it.


We also installed some curtains to keep out the morning sun's glare.

Tuesday, September 21, 2010
hotwater timer
We got a small electric tank hotwater system for the following reasons; to save water and energy (the pipe run to the instantaneous gas is quite long - 20m or so), we like the kitchen hotwater to be very hot, we want it to come on straight away and we like to trickle the hotwater.
The only problem with the small electric tank hotwater systems is that they don't have an off peak circuit. So to save on the energy bill, I have been trying to make sure it is off during the peak times (2pm to 8pm). Effectively this means turning it on just before I go bed and then turning on off when I wake up. Unfortunately not only is an effort to remember, the hotwater is not really hot come time to wash up at 7pm.
The solution was to put in a timer. The one I got from Jaycar at $60 is really good. It is battery backed up and has enough configuration so I can turn in on at 6am leave it runing through the shoulder to 2pm on weekdays and leaving it runing to 10pm on the weekend.

On the weekend, I did some more painting both inside and outside...

The only problem with the small electric tank hotwater systems is that they don't have an off peak circuit. So to save on the energy bill, I have been trying to make sure it is off during the peak times (2pm to 8pm). Effectively this means turning it on just before I go bed and then turning on off when I wake up. Unfortunately not only is an effort to remember, the hotwater is not really hot come time to wash up at 7pm.
The solution was to put in a timer. The one I got from Jaycar at $60 is really good. It is battery backed up and has enough configuration so I can turn in on at 6am leave it runing through the shoulder to 2pm on weekdays and leaving it runing to 10pm on the weekend.

On the weekend, I did some more painting both inside and outside...

Sunday, September 12, 2010
scafolding, power point and letter box
I've been sick for the last three weekends, so it was good to start working on the house again.
I "moved" the power point for the microwave so we can turn it off athe the point to save power. Ocassionally the microwave does not seem to shut off, so it is also easier to reach the switch. The toaster stopped working properly, so I recycled the power lead and a spare power point to do the job.

Yay a new letter box - nice blue colour to match the house.

We also put in some seeds and seedling out the back. Hopefully we should have a productive garden very soon. The broad beans have flowers on them and we are expecting a bumper crop.
I "moved" the power point for the microwave so we can turn it off athe the point to save power. Ocassionally the microwave does not seem to shut off, so it is also easier to reach the switch. The toaster stopped working properly, so I recycled the power lead and a spare power point to do the job.

Yay a new letter box - nice blue colour to match the house.

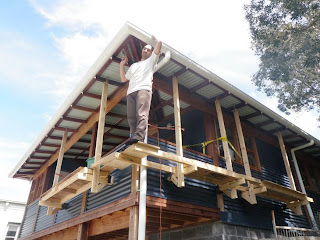
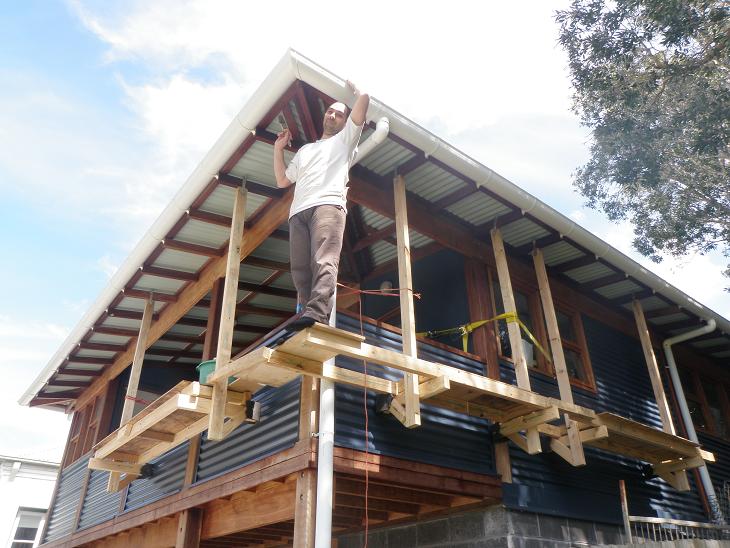
Here is me on my scafolding paintin the eves. For some reason my new neigbour across the road thought I was doing an extension - a porch.
We also put in some seeds and seedling out the back. Hopefully we should have a productive garden very soon. The broad beans have flowers on them and we are expecting a bumper crop.
Sunday, August 15, 2010
scaffolding
I've being getting around to putting the timber finish on the outside of the house. This involves setting up my ultra cool scaffolding...much safer than a ladder.

Sunday, August 8, 2010
Moving power point and splash back
After a bit of a break from blogging, I thought I would continue.
The electrical authority told me that the power point was tool close to the burners, so I had to move it. Hack, hack and it is now in a new place. It had to go into the plaster board as there is just a solid timber post behind it. I screwed the plaster board edges into the timber just to make sure they don't move.
I turned the power off to the power point circuit, but I did not realise that the exhaust fan ran off the lighting circuit. Zap, I electricuted my little finger. The RCD did do trip because the two switch wires short circuited through my finger.

Then I tiled the splash back. Not shown is the laundry and front kitchen splash backs. It will be liz's job to do the grouting - cause I don't do grouting.

The 2 floor boards bridging the pantry and the kitchen started to lift. Not good as the sliding door would no longer close. I needed to remove the sliding door to get fix the floor boards, but I could not remove the door because of them - drat. Fortunately after thinking about it for a while, I found I could saw out a little bit of the door frame to remove the door - I intend on patching it one day.
I fixed the rising floor boards using a car jack and a length of timber between the offending boards and the door frame. Just enough pressure to force the boards down, but not too much to destroy the house. Then I screwed the boards down from the underneath the floor. I made sure that the screws did not penetrate the top of the boards. Problem solved. Now I just need to get liz to paint the door and I will put it back.
The electrical authority told me that the power point was tool close to the burners, so I had to move it. Hack, hack and it is now in a new place. It had to go into the plaster board as there is just a solid timber post behind it. I screwed the plaster board edges into the timber just to make sure they don't move.
I turned the power off to the power point circuit, but I did not realise that the exhaust fan ran off the lighting circuit. Zap, I electricuted my little finger. The RCD did do trip because the two switch wires short circuited through my finger.

Then I tiled the splash back. Not shown is the laundry and front kitchen splash backs. It will be liz's job to do the grouting - cause I don't do grouting.

The 2 floor boards bridging the pantry and the kitchen started to lift. Not good as the sliding door would no longer close. I needed to remove the sliding door to get fix the floor boards, but I could not remove the door because of them - drat. Fortunately after thinking about it for a while, I found I could saw out a little bit of the door frame to remove the door - I intend on patching it one day.
I fixed the rising floor boards using a car jack and a length of timber between the offending boards and the door frame. Just enough pressure to force the boards down, but not too much to destroy the house. Then I screwed the boards down from the underneath the floor. I made sure that the screws did not penetrate the top of the boards. Problem solved. Now I just need to get liz to paint the door and I will put it back.
Subscribe to:
Posts (Atom)