Sunday, July 31, 2011

Steel Supports

As part of the garage renovation, I wanted to reinforce the bearers and posts. I bought some 8mm thick angle steel, some bolts and some coach screws.

Drilling into the steel (13mm holes) was a lot easier than I expected. Especially with one of those cheap 1/2 horse power drill presses from kmart. Admittedly 2hp would have been better. I drilled a 4mm pilot hole and then the 13mm. I kept lubricating with wd40 to keep it cool. It took around 1 minute to drill. I set the drill to its lowest speed. The steel came off in nice little sharp spirals.

Here is the end result (kind of). Coach screws to go in, steel to be painted and of course so is the concrete. The holes down the bottom are for rebar.

Sunday, July 24, 2011

Giant Radishes and Compost

One of the giant raddishes removed to prepare the garden bed. Past their eat by date.

About 6 months worth of compost going into the vege patch. Really smells. Wheely bins are great for composting. The holes in the bin clogged up, so I enlarged them to 8mm.


I visited Edcon Steel for some angle iron. Their customer service was spot one, amazing, helpful and well priced. I can't wait to purchase more steel.

Sunday, July 17, 2011

Concrete Path

After about 4-6 hours, the concrete was set enough to finish the step...


I added a contraction / crack gap in the middle and a micro spoon drain at the end. Hopefully the water will run off into the garden.

Saturday, July 16, 2011

Concrete Path

The path has to be done. I thought and thought and decided if I am going to make the concrete path, it would be good to get it over with. I only used 7 20kg bags of cement and I took a bite out of the excess sand I had from the driveway.

I had to form up a step and here it is. In a few more hours after it does its initial set, I'll take off the front timber and finish it with a broom finish.

Suddenly the mixer stopped - it over heated. I waited a bit and then pulled out a server fan for extra cooling. This is a very good reason not to get this mixer for trade use. You don't want any delays when concreting.

Opps, spare concrete. I though I would box it.

Sunday, July 10, 2011

Louka's Throne

Just went to Ikea to buy Louka a comfy chair in washable fake leather. Being a small child, I made a platform for the chair and now it is a thone/highchair. The platform also serves as a step for her to get onto the chair and I doubt whether she will be able to tip it over. I'm going to line the base in carpet so it can be slid along the floor.

Saturday, July 9, 2011

Concrete Repair

This is a crop from an old photo of what the path use to look like. You can just make out the rough concrete. Kind of looks like an awkward path.

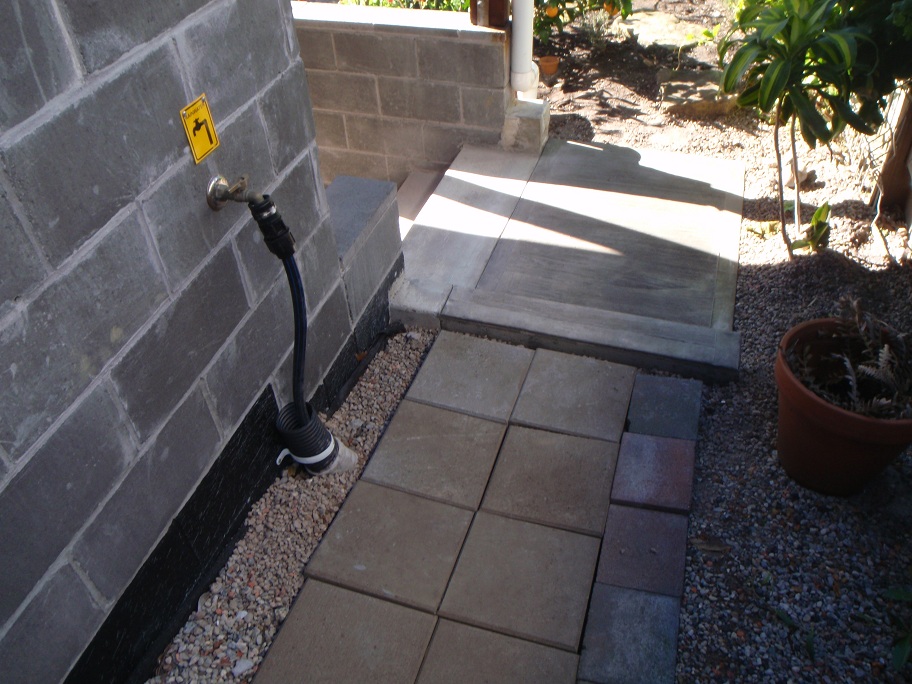
Here I have moved the hose reel and the platform at the top of the stairs looks stable and usable. More concreting to go to replace the pavers.

A close up of the concrete repair a week later.. You can barely notice the "seam" and definitely no cracking or crumbling.

Sunday, July 3, 2011

Concrete Path and Being Sick

Inspite of having a dreadful virus (sore muscles, sore throat, flem etc), I thought I would soldier on and fix up the path.

When I first put in the steps up from the garage level, I had to remove one because the head clearance over the step was a bit low. This left me with some jagged concrete and exposed re-inforcing.

To fix up the jagged concrete, I used my angle grinder with a diamond blade (+ Liz continuously spraying the blade with water) to cut out a 50mm deep rebate below where the step use to be. Then came out the cheap almost useless Ozito jack hammer to remove the concrete. I also cut down further the exposed re-inforcing. I used non-shrink grout to fill in this rebated section.

Also in the photo you can see the corner slab and the added step. You can also see the contraction joint between the corner slab and the repaired concrete.

I had to wait around 4 hours before the concrete had set enough to remove the step form and do the finishing.

I'm really hoping that because I did such a deep rebate, used non shrink grout and put in a conctraction joint, the repair will work and not just crumble.

I also buried some 100mm diameter agricultural pipe to run pipes and cables through.

Tuesday, June 28, 2011

Ozito Cement Mixer

In spite of some initial concerns with the cement mixer groaning, after mixing a total of around 3 cubic metres of concrete, I'm pretty happy with in. It does a full bag mix and it is also great for mixing soil.

I found that during my driveway laying, the cement mixer was almost always going. After it finished mixing, I'd dump the concrete into the wheel barrow and start up another mix. I would only start placing the concrete once the next mix was going. I think it would be a bit tedious to use a smaller mixer.

Certainly mixing the cement yourself, you don't need any helpers. Possibly one person full time on the mixer to guarentee 100% utilisation may be worth it for a big job.

I'd use it to put in a small slab for a small home workshop - say 2 x 3 metres but that is probably about it. It is great for DIY paths.

By the end of half a day's mixing, I really needed to blast it with a pressure cleaner to clean out the bowl.

Sunday, June 26, 2011

Controversial Jacaranda Tree

The controversial Jacaranda tree

Saturday, June 25, 2011

Mum at Manly


Queencliff Freshwater Tunnel

If you ever visit Manly, on the far side of the beach, there is an ancient tunnel to explore.

It is a secret passage between Manly (Queenscliff) and Freshwater beaches. It is easy to get to from the Manly side, but it is a real adventure to make it all the way to Freshwater beach.

Suitable for my mum, Louka and anyone really. The warning sign is just about falling rocks.

The tunnel entrance...

The reward, it is this tunnel, it is suprisingly long and opens up to a sun filled ledge - unfortunately there are no seats.

Finished Driveway

A picture of the finished driveway. One of the tracks is 30cm shorter - thanks to the burst pipe. It is all seeded and ready to grow. Also the moved hose. In a much better position.


DIY Potting Mix

Potting mix is expensive, so why not mix your own.

I bought yet another cubic metre of compost from the recycling centre $35. They used a massive front end loader to load it. It took them 4 "bucket loads" to fill my ute tray simply because the bucket was twice the width of my tray and they didn't want to spill anything.

Anyway, with my trusty cement mixer, I sure made quick work mixing the compost, sand and a bit of ammonia sulfate. It mixed very quickly and very well - a minute per wheel barrow load.

I found that you can no longer get ammonia nitrate nor potasium nitrate (thanks to alkada and a paranoid government).

I lowered the blocks just so there is a level pathway beside the driveway

Forming up fro the concrete around the stormwater pits...

The finish product, complete with native violets

Thursday, June 16, 2011

Leaf Tailed Gecko Poetry

Our friendly leaf tailed gecko is pictured here. On my spade. Rescued from a pit trap. A few hours later, it disappeared. End.

Wednesday, June 15, 2011

Burst Water Pipe

I managed to put a star picket through the water main - unfortunately not my side of the meter. I got some plumbers out and they installed a dodgy clamp that was really only meant for gal pipes. It still dribbled a little bit.

A week later after the concrete set and being one not to miss a DIY opportunity, I made a pipe crusher out of some timber and M12 bolts. It did kind of work - ie reduce the flow a bit more.

When the plumber arrived 10 minutes later at 7am to freeze and properly repair the pipe, he undid the meter and we bent the pipe over and further reduced the flow - still trickling. So it was 5 pound hammer time bashing the pipe sealing it even more.

In addition to fixing the pipe, I got him to install a couple of gas heater outlets.


Neat pipe crushing job...


No so neat pipe bent over and bashed job. You can also see the star picket damage...

Monday, June 13, 2011

New improved temp controlled fridge

After working out I can use the MTC-3000 for a temperature controller for both cooling and heating, I fitted it as an upgrade to my beer brewing fridge.

In my previous blog entry a converted a whole pile of giberious into a fancy state diagram just to really understand how it works.

The MTC-3000 (which I bought cheap off the net) is really only designed for a industrial fridge. However, it does support a frost free mode (ie auto defrost). I hooked up the defrost to the power point - which in turn powers the mortein 10Watt bug killer which I use as a heater. The fridge is set to turn on at 22 degrees and turn off at 20. The heater (defrost) is set to 18 degrees (or lower). But because it is a defrost controller it I've configured it to turn it on for 30 minutes on a hour cycle while the temp is below 18 degrees.


You can see I actually ripped out the fridge's thermostat. I'm not too sure how much I would be able to sell my modified fridge on the net for. The power point is in a bad position - I'll move it tomorrow.

Saturday, June 11, 2011

MTC-3000 state diagram


Here is a state diagram for the MTC-3000 controller...

I want to use it to control my beer fridge and the user doco is a bit hard to understand so I thought I would create a state diagram.

Thursday, June 9, 2011

Temperature Controlled Cupboard


Here is the temperature controlled cupboard for Liz's sourdough starters....It kicks in at 25degreesC and turns off at 22.


Sunday, May 29, 2011

Driveway 4

In go the soil and cement footings. Half a bag of cement to 16 shovels of soil.

Towards the end of the pour it started to rain, up go the tarps...I sent Liz off to get some more cement. This is how much I had left to go. Fortunately she just got back just as I finished the last pour.
This is some of the sandy clay that is very deep in the ground.

The morning after - more rain. Notice the quality of _my_ crappy camera...


Friday, May 27, 2011

Drive Way 3

I've just formed up the first track of the second drive way. This one will be 800m wide rather than 600mm. This should make it easier to park.


I used packers sometimes to make sure the timber position is just right.

I had to make a bridge so I can actually get the concrete where it needs to be.

Instead of encounter heaps of tree roots (I just had a few), I had to remove a thin layer of concrete that was left over from the building.